How to Get the Perfect Contour: Secrets to Sculpting Your Face Like a Pro
Contouring has become a staple in makeup routines, offering an easy way to enhance your face shape, highlight your features, and achieve a more sculpted, chiseled look. Whether you’re looking to define your cheekbones, slim down your nose, or add a little warmth to your face, contouring can transform your entire look. However, getting it just right can be tricky without the proper tools, techniques, and products.
We’ll guide you through the best contouring tips, the products that will help you achieve the perfect contour, and how to choose the right products for your skin type and preferences. Whether you’re a beginner or a pro, this step-by-step guide will help you sculpt your face like a makeup artist.
Why Contouring Is Important for Your Makeup Routine
Contouring is more than just about creating shadows and highlights on your face. When done correctly, it enhances your natural bone structure, adding definition to the face. Contouring involves two main steps:
- Shading: Adding shadows to create the illusion of depth.
- Highlighting: Adding light to enhance features.
Done properly, contouring can add warmth to your face, making it look slimmer, more defined, and youthful. But it’s all about balance—you want your contour to be subtle and natural, not too harsh or overly dramatic (unless you’re going for a bold look, of course).
Step 1: Start With a Good Base
Before diving into contouring, it’s essential to start with a smooth, even base. Use a full-coverage foundation to even out your skin tone. This will provide a clean canvas for contouring, making the product blend more seamlessly.
For Oily Skin: Mattifying Foundations
If you have oily skin, choose a mattifying foundation that controls shine and gives you a long-lasting finish. These foundations won’t slip or break down as you contour, ensuring your makeup stays in place all day or night.
Recommended Product:
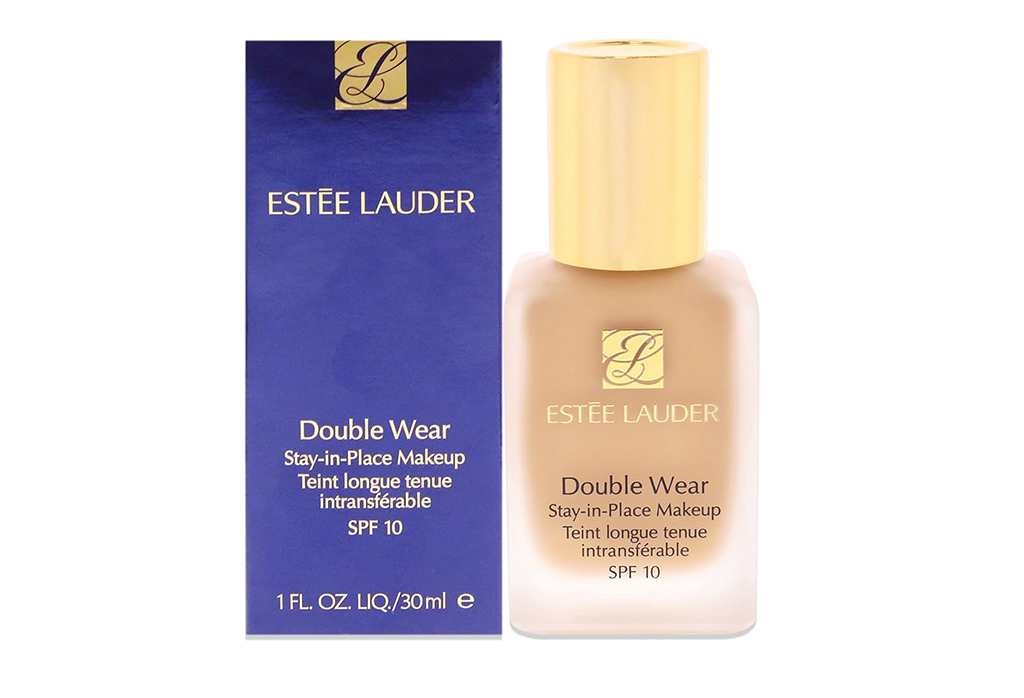
- Estée Lauder Double Wear Stay-in-Place Foundation: This oil-free foundation offers full coverage with a matte finish that stays put for up to 24 hours. It’s perfect for oily skin and provides a flawless base for contouring.
- Where to Buy: Sephora, Macy’s
How to Use: Apply using a beauty blender or foundation brush for an even, airbrushed finish.
For Dry Skin: Hydrating Foundations
If you have dry skin, opt for a hydrating foundation that adds moisture to the skin, preventing it from looking cakey. Look for foundations that contain hyaluronic acid or glycerin to keep your skin hydrated throughout the day.
Recommended Product:
- NARS Sheer Glow Foundation: This foundation is perfect for dry skin, offering a dewy finish while providing buildable coverage. It leaves the skin looking luminous without clinging to dry patches.
- Where to Buy: Sephora, Nordstrom
How to Use: Apply evenly with your fingers or a brush, making sure to blend it well into your skin.
Step 2: Choose the Right Contour Products
Now that your base is flawless, it’s time to add dimension and definition with contouring products. You can use creams, powders, or sticks depending on your preference and the look you’re going for. Each texture has its benefits:
- Cream Contours: Ideal for dry or mature skin, as they blend easily and give a more natural finish.
- Powder Contours: Best for oily skin, as they help to set makeup and can be more matte.
- Contour Sticks: Perfect for on-the-go, offering easy application and great for beginners.
For Natural Contouring: Cream Contours
Cream contours give a more seamless and natural look. They’re perfect for creating subtle shadows on your face. Choose a contour cream that’s a few shades darker than your skin tone to create a soft, blended shadow.
Recommended Product:
- Fenty Beauty Match Stix Matte Skinstick: This contour stick has a creamy, blendable formula that’s perfect for creating soft, natural-looking contours. It’s available in multiple shades, so it works well for different skin tones.
- Where to Buy: Sephora, Fenty Beauty
How to Use: Apply directly to the hollows of your cheeks, jawline, and sides of your nose. Use a makeup sponge or brush to blend it into your skin.
For Sculpted Contouring: Powder Contours
Powder contours are great for oily skin and for those looking to create a more defined, chiseled look. Look for powder contour palettes that offer a variety of shades to help you sculpt different areas of your face.
Recommended Product:
- Anastasia Beverly Hills Contour Kit: This palette includes six shades for contouring, highlighting, and bronzing. The powders are finely milled and blend effortlessly for a sculpted, matte finish.
- Where to Buy: Sephora, Anastasia Beverly Hills
How to Use: Use a fluffy brush to apply contour powder to the hollows of your cheeks and jawline. Blend it out for a seamless finish.
For Quick and Easy Contouring: Contour Sticks
Contour sticks are great for beginners who want a quick and easy way to contour. They’re easy to apply and blend, and they come in both cream and stick formulas.

Recommended Product:
- Maybelline New York Master Contour V-Shape Duo Stick: This dual-ended stick has both a contour shade and a highlighter for easy sculpting. The creamy texture blends seamlessly into the skin, making it ideal for quick, everyday contouring.
- Where to Buy: Target, Amazon
How to Use: Draw lines along your cheekbones, jawline, and nose. Use your fingers or a makeup sponge to blend the product into your skin.
Step 3: Highlight Your Features
The key to contouring is balancing it with highlighting to bring out the high points of your face. Apply a highlighter to your cheekbones, the bridge of your nose, your forehead, and under your brow bone to make these areas appear lifted and illuminated.
For a Natural Glow: Liquid Highlighter
Liquid highlighters offer a dewy, natural finish that works well for dry skin types, giving a subtle glow to the face without looking too metallic.
Recommended Product:
- Becca Shimmering Skin Perfector Liquid Highlighter: This liquid highlighter is a cult favorite for its radiant, skin-like finish. It’s available in multiple shades to suit a variety of skin tones.
- Where to Buy: Sephora, Ulta Beauty
How to Use: Apply a small amount to the high points of your face and blend using your fingers or a brush.
For an Intense Glow: Powder Highlighter
Powder highlighters are ideal for oily skin or anyone who prefers a more dramatic, long-lasting highlight. They provide a shiny, luminous finish that will catch the light and make your cheekbones pop.
Recommended Product:
- The Balm Mary-Lou Manizer: This powder highlighter gives a gorgeous, champagne glow and works beautifully for all skin types. It’s easy to blend and highly pigmented.
- Where to Buy: The Balm, Sephora
How to Use: Use a fan brush or highlighter brush to apply the powder to the tops of your cheekbones, down the bridge of your nose, and on your cupid’s bow.
Step 4: Blend, Blend, Blend!
Blending is key to achieving a natural-looking contour. Make sure you use the right tools, such as blending sponges, fluffy brushes, and kabuki brushes to seamlessly blend your contour and highlight. Never leave harsh lines—blend until the product melts into your skin.
Recommended Product:
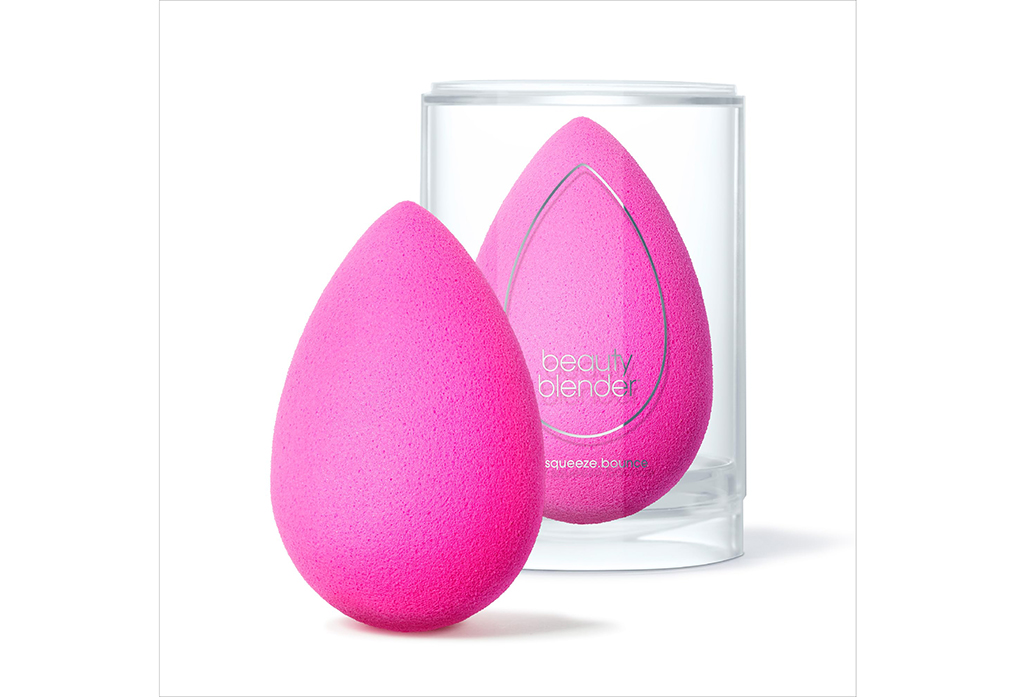
- Beautyblender Original: This sponge is perfect for blending contour and highlight, giving you an airbrushed finish. The pointed tip allows for precise application, while the rounded side is perfect for blending larger areas.
- Where to Buy: Beautyblender, Sephora
Sculpt Like a Pro
Achieving the perfect contour is all about using the right products and techniques for your face shape and skin type. Whether you prefer cream, powder, or stick products, there’s something for everyone. Take the time to experiment with different textures and shades, and always remember the importance of blending to create a flawless, natural finish. With the right products, you’ll be able to sculpt your face like a pro in no time!
Where to Buy:
- Sephora (www.sephora.com)
- Ulta Beauty (www.ulta.com)
- Amazon (www.amazon.com)
- Macy’s (www.macys.com)


You May Also Like
Frosty Glamour: Elevating Your Winter Look with Trendy Makeup Styles
Flawless Foundations: Discovering L’Oréal Paris Foundations
